
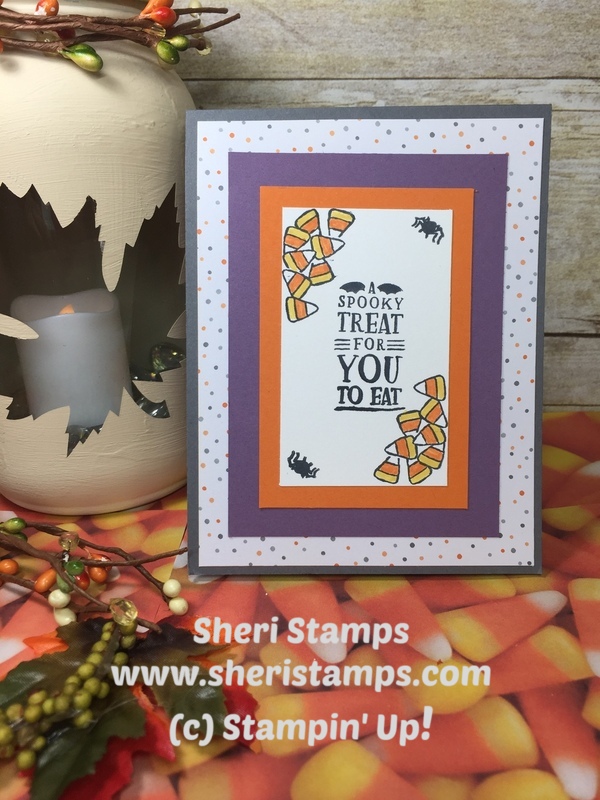
Hey Stampers!
Welcome to the Stamp It! Group Easter Blog Hop!
I can not wait to see all the awesome projects everyone has created for today.
For Easter I could not help myself. I had to use our super cute Bunny from the Sweet Little Something Stamp Set. I just love this set! It really amazes me how real this Bunny looks.
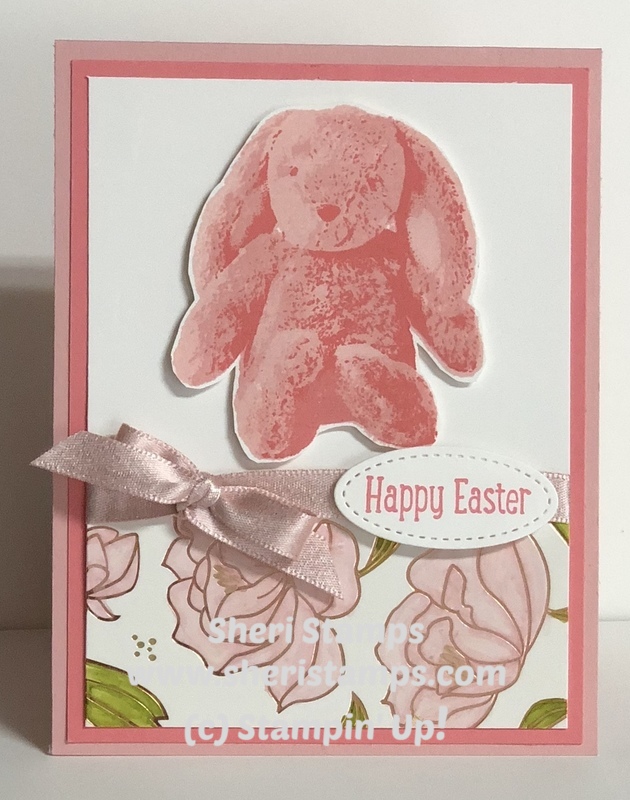
I have a pretty simple layout for this card. I really wanted the Bunny to be the main focus.

Stamping the Bunny is a 3 step process. I used the Flirty Flaming Ink Pad as my darker color for the more detailed stamp. Then for my medium color and the stamp with a little less detailed I used the Blushing Bride Ink Pad. Then finally for the stamp with the least detail I used my lightest color, Powder Pink Ink Pad. I just love these 3 colors together.

I fussy cut my little bunny so I could pop him up on the card.

I added a piece of Sale-A-Bration’s gorgeous Springtime Foils Designer Series Paper and used my Stampin Blends Markers to color in the flowers and leaves. I finished the card off with the beautiful Powder Pink Shimmer Ribbon.

I hope you like the card I made today. Please continue on the hop to see all of the projects.
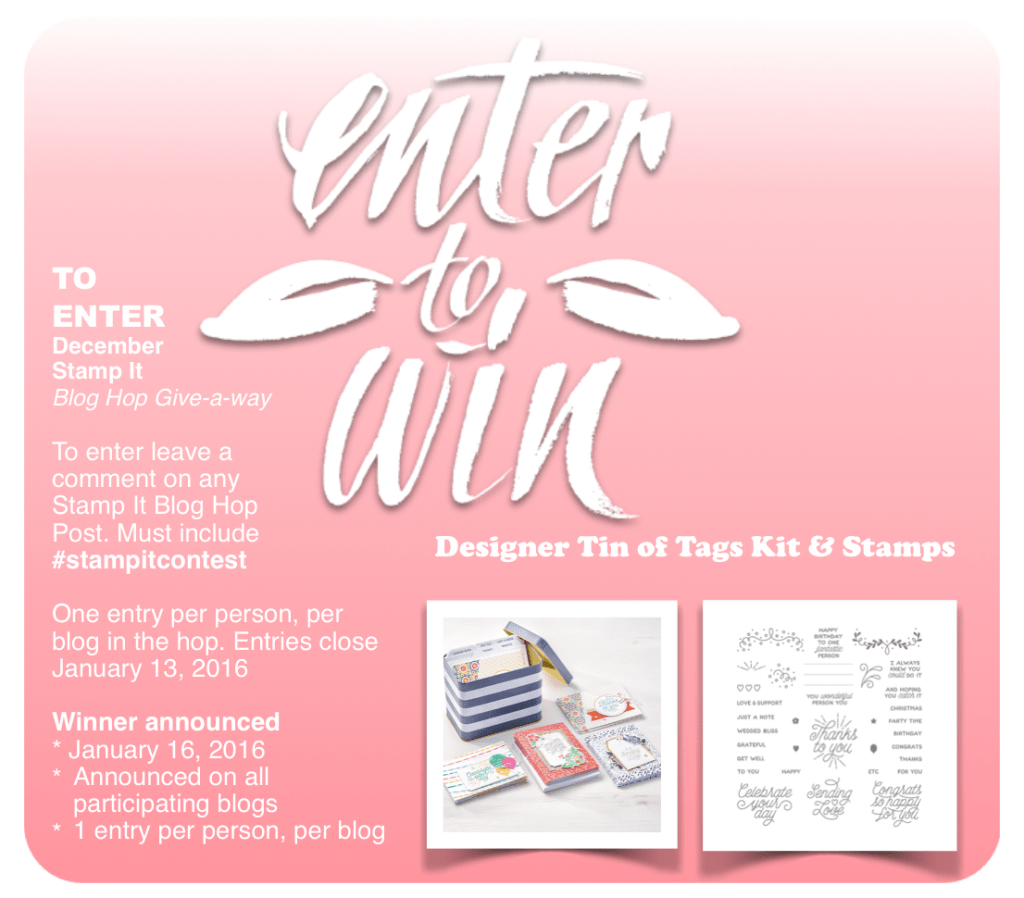
Make sure to post a comment and add #stampitcontest to it. Post on all blogs to get more chances to win the great prize below.
Happy Stampin’ Y’all!


BLOG HOPPERS
| 1. | Tami White | |
| 2. | Brenda Diaz | |
| 3. | Tina Wardell | |
| 4. | Lori Mueller | |
| 5. | Pam Nichols | |
| 6. | Sheri Meyer | |
| 7. | Rachael Rife | |
| 8. | Linda Cullen | |
| 9. | Christina Miller | |
| 10. | April Mohn | |
| 11. | Julie DeGuia | |
| 12. | Gianna Melone-Sardella |
Product List
|
|
|||
|
|


 Satin Ribbon")


 Glitter Ribbon Combo Pack")


 I chose the colors Pacific Point and Tip Top Taupe. I also added 2015-2017 In Color Designer Series Paper Stack in Tip Top Taupe. The World Stamp and world’s best dad were stamped in versa mark and embossed with Black Embossing Powder. I used the 2″ circle punch for the world and the layer behind it. Then I used the The Washi Tape punch for the sentiment.


 When building my gift card holder I wanted it to be sturdy. I knew I would be opening and closing it a lot. So, I doubled my card stock before cutting out my template. I just used my Multi Purpose Liquid Glue, and glued 2 pieces of card stock together. I also used my glue to adhere my gift card holder to the inside of the card. Once I had my card together I decided to glue another piece of card stock to the back of my card. The front was very sturdy with it’s layers so I cut a piece at 5 1/2″ X 4 1/4″ and used my glue and added to the back. This made the card really sturdy.
 I really hope you have enjoyed my card today. It was so fun to make. Remember to come back to my blog next week for the free template to make your own.


